Many new e-learning experiences have been passing my way since my last post,as usual I seem to be time poor.Reflection has been the key word of my recent tasks.
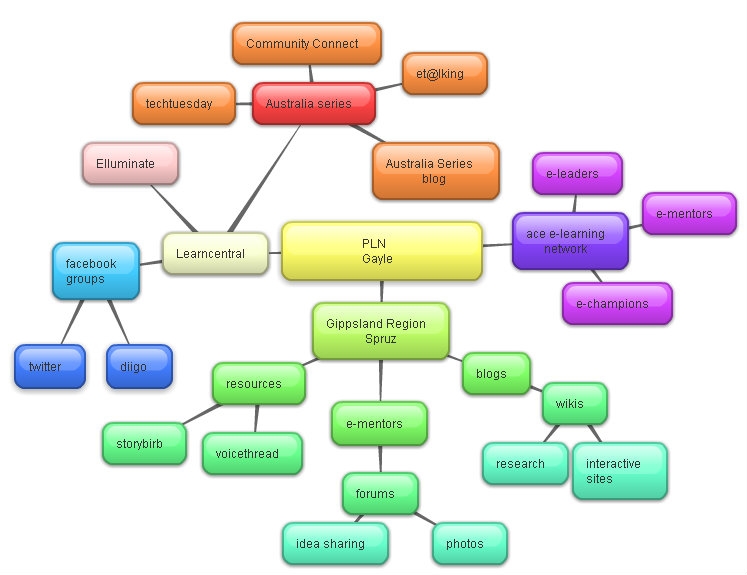
Putting together a view for displaying my Personnel Learning Network,using bubbl.us a new e-tool and a new skill.
I found I could apply the same visual display for my Community of Practice assignment,the content of these 2 tasks I found I could do with ease,it is something I know.
Both my Personal Learning Network and my Community of Practice network offer support and essential learning in much the same way, they are relevant to my workplace and like minded colleagues.
So often in my job we work in isolation, in small rural communities you need others to bounce your ideas off and share them as well.
I intend to maintain these networks with regular visits to sites and inform other colleagues, invite them to come along the e-journey.
This got me thinking (reflecting) about how it feels to be a learner and how easy it is to take those skills learned for granted. How out of my depth I have felt when I couldn't work it out,and frustrated that I was unable to move on from that task.
So for the past week I have been thinking of the learners in my workplace,they come to gain new skills. So its important they don't experience too much of that overwhelmed feeling,its easy to assume they are ok.... when my tutors or I have the skills..
I was pleased our group task this week was something I knew about as I belong to a couple of Community of Practice groups .
 As part of my challenge mentor roll I was asked to co -present with one of the design team of the EpCop MOOC,in this session we demonstrated how to navigate around the Blackboard/Collaborate live classroom.